We love our dogs, and yet we still find ourselves neglecting them – not out of ill will, but from that familiar loop of "there'll be more time tomorrow," "I'll trim those mats once it's lighter out," "I'll borrow some clippers from a neighbour," "I'll book a groomer's appointment next week." Every owner of a long-haired dog knows the feeling of stroking their dog and suddenly finding, under their fingers, a hard, tightly packed clump of hair whose existence you'd rather not have noticed. Sometimes you need to step back and look at it honestly, because, as we know, nobody's perfect, though that's a fairly poor excuse to offer a dog who carries the results of our "tomorrow" plans on its body every single day. In this article, we've gathered everything worth knowing about caring for a Cavalier's coat: brushing, preventing and safely removing mats, caring for the ears, eyes and paws, and the tools that genuinely make life easier rather than just sitting in a drawer. We hope that, just like our video, this guide will help you turn grooming into an enjoyable ritual rather than one more chore that's easy to put off.
Why Regular Brushing Matters So Much
Let's start with the basics: why does brushing get so much attention at all, when in many households the topic gets treated as an afterthought, and the dogs seem to manage just fine anyway? The answer is simpler than it might seem – a Cavalier's coat, unlike that of many other dogs, genuinely needs regular attention, and neglecting it has real health consequences, not just cosmetic ones.
The Role of Coat and "Feathering" in the Cavalier
The Cavalier King Charles Spaniel has a medium-length coat, silky to the touch, with characteristic "feathering" on the ears, chest, belly, backs of the legs, and tail. This type of hair is beautiful, but by nature it's more prone to tangling than short, smooth fur – especially in spots exposed to friction, like the armpits or groin, or where the hair is longest and finest, like behind the ears. Unlike breeds with short, close-lying coats, where wiping the dog down with a damp cloth now and then is enough, a Cavalier genuinely needs systematic brushing to keep its coat in good condition.
What Happens When Brushing Is Neglected
Without regular brushing, individual loose hairs start tangling into small clumps, which over time join into larger, increasingly hard structures – mats. The longer a mat is allowed to grow, the harder it becomes to brush out, and at some point the only solution left is cutting or shaving off that section of coat. It's a vicious circle – the longer you put off brushing, the more time, patience, and effort (both yours and the dog's) it will take to get the coat back in order.
Mats Are Not Just a Cosmetic Problem
It's worth remembering that a neglected, matted coat isn't only a matter of appearance. Mats close to the skin can pull and press against it with every movement the dog makes, creating discomfort and sometimes genuine pain. Moisture and dirt build up underneath large, tight mats, encouraging skin irritation, and in neglected cases, the development of skin inflammation that stays hidden until the mat is removed. That's why regular brushing isn't a cosmetic whim – it's a genuine part of preventive health care, just as important as other, more obvious aspects of caring for a dog, even if it gets talked about less.
A mat that looks harmless from the outside can hide damp, irritated skin just underneath. If you're not sure whether what you're looking at is still "just a mat" or something more, the safest thing is to show it to a vet or groomer.
The Spots Most Prone to Matting
On a Cavalier, there are spots that need special attention, because mats form there far more often than anywhere else:
- behind the ears, where the hair is fine, long, and exposed to friction from the head and collar,
- under the arms, where the skin folds with every movement of the legs,
- in the groin area and on the inner thighs,
- behind the hind legs, where the "feathering" rubs against itself while walking,
- on the chest and belly, especially in dogs that spend a lot of time lying down,
- on the tail, particularly near its base,
- around the collar, where constant pressure and friction encourage the hair to felt together.
It's worth spending a few extra minutes on these areas during every brushing session, rather than limiting yourself to a quick brush over the back, which rarely causes problems anyway. Many owners we talk to at our clinic admit that they brush their dog "by eye," focusing on the visible parts of the coat, while skipping exactly the spots that are the most problematic, simply because they're harder to reach.
A good habit is to introduce a short, systematic "check" round during every thorough brushing session: start with both hind legs and the area behind them, then the armpits and groin, then the ears and the area under the collar, and finish with the back, tail, and chest. This fixed order means no spot gets skipped by accident, and over time it becomes a routine you can run through almost automatically, without having to stop and think about what else needs checking. For the dog, this kind of predictable sequence can also be reassuring – it knows what to expect at each stage.
How Often to Brush a Cavalier
A Daily Routine or a Few Times a Week?
For dogs with a Cavalier-type coat, brushing a few times a week works best, and in spots especially prone to matting, ideally daily or every other day. A short daily session, even just a few minutes long, gives better results in the long run and is less stressful for the dog than a rare but long and laborious detangling of neglected fur once every couple of weeks. It helps to think of brushing a bit like brushing teeth – a short, daily task that prevents much bigger problems down the line.
Periods That Need Extra Attention
During heavy shedding, as well as after strenuous walks, especially through woods, tall grass, or mud, and after swimming, it's worth stepping up how often you brush. Wet fur, after a swim in a lake or a rainy walk, tangles more easily, so a thorough check and brush-through once you're back home helps you avoid surprises a few days later.
Brushing a Puppy and Building the Habit
The best time to introduce regular brushing is puppyhood – before the dog has had a chance to form any negative associations with it. A puppy's coat is usually shorter and less prone to matting, but this is exactly the period to make the most of for building the habit: short, calm sessions in which the dog learns that lying still and allowing its paws, ears, and tail to be touched is completely normal, even enjoyable.
Essential Grooming Tools
Well-chosen tools are half the battle – and mean less frustration on both ends of the brush.
Combs
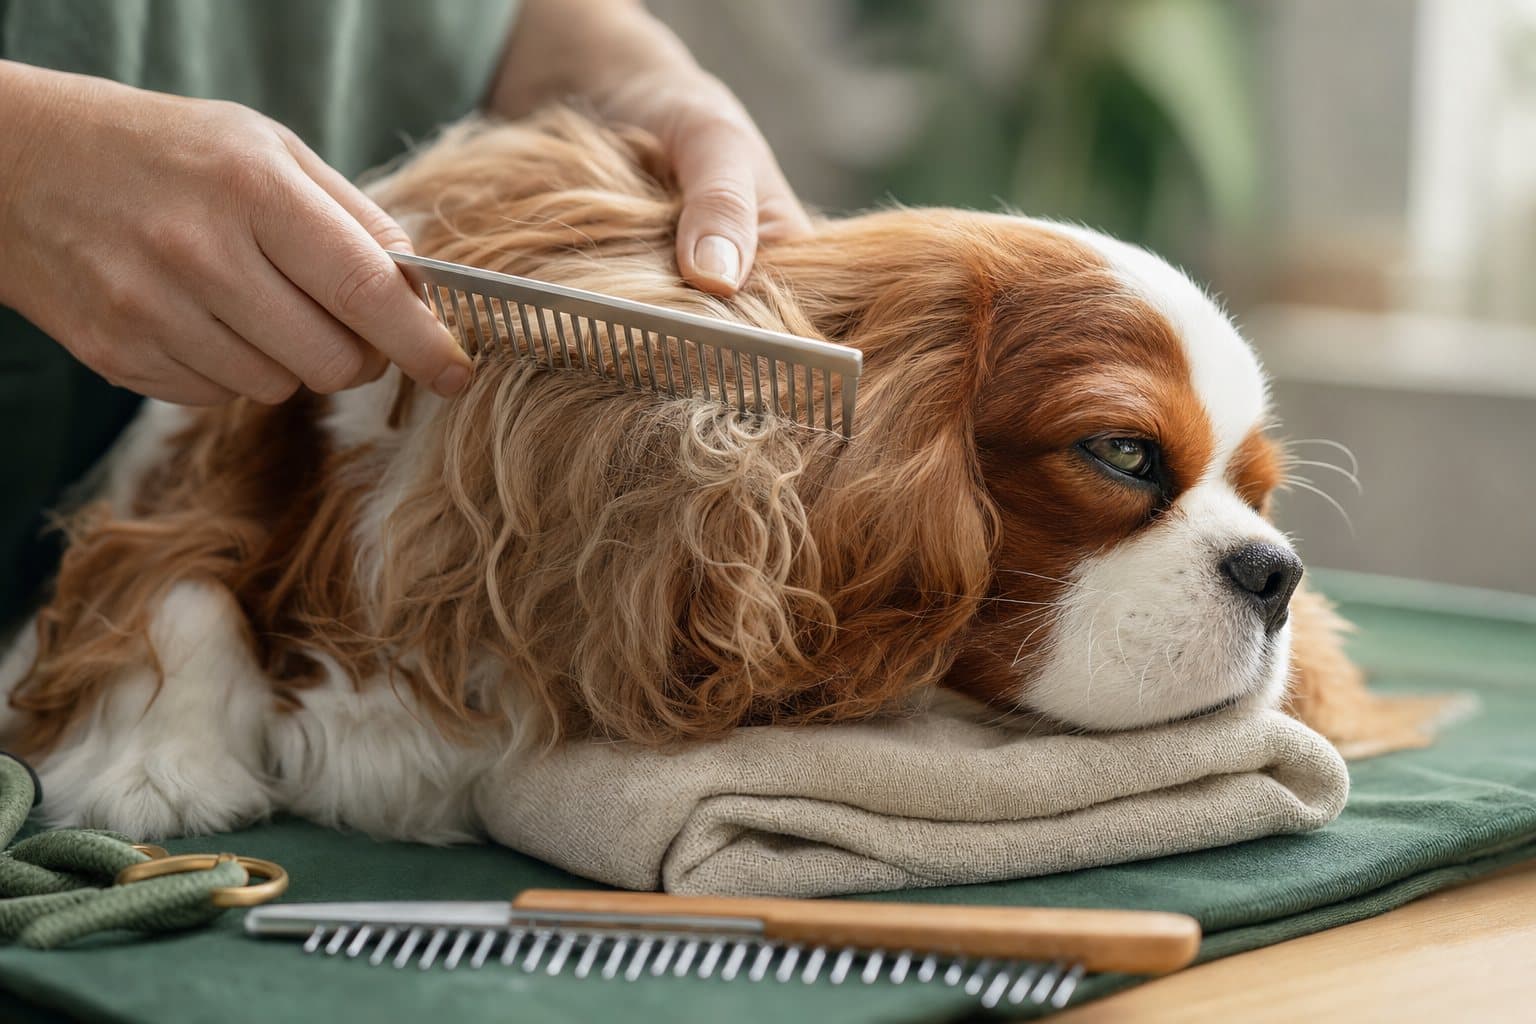
A wider-toothed comb works well for an initial, general brush-through, while a finer-toothed comb, sometimes called a flea comb, lets you check the state of the coat closer to the skin and catch small, early-stage mats before they grow.
Brushes
A slicker brush, with fine, densely packed wire bristles, handles daily brushing and removing dead undercoat well. A natural-bristle brush can help add shine and smooth the coat at the end of a grooming session, though on its own it won't replace a thorough brush-through with a comb.
A Dematting Tool
This is a tool with curved, sharp teeth designed specifically for separating matted hair without having to pull it out. It works well on smaller and medium mats, but can fall short with very large, hard ones.
Round-Tipped Scissors and Clippers
Scissors with a blunt, rounded tip let you safely trim a section of coat without risking injury to the skin, if a mat needs to be cut. Clippers can be indispensable for large, tightly packed mats close to the skin that can no longer be safely brushed out or trimmed with scissors.
Detangling Spray and Conditioner
Detangling sprays moisturise the hair and reduce friction between strands, which makes brushing significantly easier, especially with dry, static-prone fur. It's a tool that's easy to forget, yet it can cut brushing time in half.
Grooming Gloves and Other Helpful Accessories
A grooming glove fitted with small nubs can be a good introduction to grooming for dogs that don't yet tolerate a regular brush – to the dog it feels like petting, while still removing loose hair. It's a good starting tool, though it won't ultimately replace a comb and brush for thorough feathering care.
Looking After the Tools Themselves
Combs and brushes need looking after too – hair that builds up between the teeth makes brushing harder and can carry dirt from one session to the next. It's worth regularly clearing hair out of them, and now and then washing them in warm water with a little mild detergent, drying them thoroughly before the next use. A well-kept, clean tool simply works better than one clogged with leftovers from the last session, and it also reduces the risk of skin irritation if debris has gotten stuck in the brush.
Brushing Technique, Step by Step
Technique matters just as much as frequency – brushing done incorrectly, even if done regularly, can be unpleasant for the dog and less effective than you might expect. The steps below work in most situations, though it's worth adapting them to your particular dog's temperament and sensitivity.
- Start by spraying a little detangling product onto the coat if the hair is dry or has tangled previously.
- Work in sections – one leg, then the other, ears, chest, back, tail – rather than trying to brush the whole dog "in one go."
- Hold the base of a lock of hair against the skin with your hand, and only brush above that point with the comb or brush – this protects the skin from unpleasant pulling.
- Brush from the tips of the hair toward the skin, rather than straight down from the skin, to avoid packing tangles into an even harder clump.
- Regularly check the spots most prone to matting with a fine-toothed comb – if the comb glides freely through the coat all the way to the skin, everything is fine.
- Praise and reward the dog throughout the session, not just at the end – this builds positive associations with brushing.
The whole procedure, carried out regularly, shouldn't take more than a few minutes a day – as long as you're not starting from neglected fur full of mats, in which case the first session will naturally be longer, and it's worth splitting it into several shorter attempts rather than wearing the dog out with one long one.
How to Prevent Mats from Forming
Prevention, in this case, is far simpler, cheaper, and less stressful than removing large mats that have already formed, so it's worth treating the list below as a standing reference rather than a one-off tip.
- Set a fixed brushing rhythm and stick to it, rather than brushing "once in a blue moon."
- After every walk through tall grass, woods, or mud, check the coat for tangled burrs, grass seeds, or caked-on mud.
- While drying the dog after a bath or rain, brush the coat as you go, rather than waiting for it to dry on its own.
- Regularly trim overly long fur in the spots most prone to matting, if your groomer flags the need for it.
- Use a moisturising spray on dry, static-prone fur, especially in winter, when indoor heating dries out the air and the coat even further.
- Don't put brushing off until "tomorrow" – the longer you wait, the harder and more time-consuming the session becomes.
- Check the coat after play with other dogs, especially if it involved tugging or rolling around on the ground.
How to Safely Remove Mats
Assessing the Size and "Hardness" of a Mat
Before you start, assess what you're dealing with: a small, loose tangle can usually be brushed out with fingers and a comb, while a large, hard mat packed tight against the skin may call for a completely different approach – and sometimes a specialist's help. A good way to check is to gently try sliding a finger between the mat and the skin – if you can't, and the dog reacts to the touch with pain, it's better not to try to sort it out yourself.
Working It Loose with Fingers and Spray
For smaller mats, it's best to start by applying detangling spray, then gently separating the hair with your fingers from the edges of the mat toward the centre, patiently, in small sections. This stage takes time and calm – rushing only increases the risk that the dog will start pulling away, and that you'll unintentionally tug at the skin.
Working with a Dematting Tool from the Edges
If fingers alone aren't enough, it's worth reaching for a dematting tool and working from the outer layers of the mat toward the centre, always holding the skin at the base to reduce uncomfortable pulling. Patient, small movements give a better result than trying to remove the whole mat in one pull.
When to Use Scissors – and How to Do It Safely
If a mat needs to be cut, use only scissors with a rounded tip, and cut the mat vertically, that is, along the direction of hair growth, rather than horizontally, parallel to the skin – this kind of cut reduces the risk of accidentally injuring the skin and leaves a less noticeable gap in the coat than shaving the mat off flush with the skin. Never cut "by feel" toward the skin if you can't see exactly where the mat ends and the dog's skin begins.
When to Hand It Over to a Groomer or Vet
Large, hard mats sitting close to the skin, especially around the armpits, groin, or behind the ears, are safer left to an experienced groomer, who has the right equipment and skill to remove them without injuring the skin. If you suspect there might be irritated or damaged skin underneath a mat, it's worth consulting a vet straight away rather than attempting to deal with it at home.
Large mats, especially ones formed close to the skin, can pull and press against it with every movement, and in extreme cases restrict circulation in that spot. Damp, irritated skin often hides underneath a mat, and sometimes even small wounds that aren't visible until the mat is removed. If you're not sure you can handle it yourself, don't take the risk – ask for help.
Caring for a Cavalier's Ears
Long, densely furred ears are one of the Cavalier's breed traits – and also a spot that needs constant attention. The hair growing at the base of the ear and inside the ear flap tangles easily, and the limited ventilation inside the ear encourages moisture and wax to build up. Regularly checking the ears, gently brushing the fur around them, and, if necessary, trimming excess hair around the entrance to the ear canal, help maintain better airflow and make it easier to catch early warning signs, such as redness, an unpleasant smell, or excess wax.
It's best to learn routine checking and, if needed, gentle ear cleaning from a groomer or vet, especially when it comes to removing hair growing inside the ear canal itself – this is a procedure that, done without proper skill, can cause more harm than good.
If, while brushing around the ears, you notice pain, intense itching, head shaking, or an unpleasant smell – don't try to manage it yourself at the expense of the dog's patience. That's a signal for a vet visit, not more intensive brushing.
Caring for a Cavalier's Eyes
Large, expressive eyes are another characteristic feature of the breed – and another spot that needs regular attention during coat care. It's worth trimming hair that grows too close to the eyes on an ongoing basis, so it doesn't irritate the cornea or get in the way of the dog's vision, and gently wiping the area around the eyes with a damp, clean cloth if you notice dried discharge in the corners.
Don't trim the fur around a dog's eyes if you don't feel confident doing it – this is a sensitive area, and a careless snip with scissors can end in a cut. If in doubt, ask a groomer or vet to show you how.
Because this breed can be predisposed to certain eye conditions, it's worth watching for excessive tearing, redness, squinting, or a change in the colour of the cornea. If in doubt, it's best to consult a vet, ideally before a minor sign turns into a bigger problem.
Caring for Paws and Nails
Coat care isn't just about brushing the back and the feathering – it's worth remembering the paws too. Regular nail trimming prevents nails from cracking and from placing abnormal stress on the joints, and checking the spaces between the toes lets you catch burrs trapped in the fur, small stones, or early-stage mats before they start getting in the dog's way when walking. It's also worth checking between the paw pads, especially after walks outdoors, where small cuts or embedded debris can easily go unnoticed for a long time otherwise.
Trimming Nails Safely
Trimming nails tends to worry owners more than brushing does, mainly out of fear of cutting into the quick, the blood-supplied part of the nail. If you don't feel confident doing it yourself, a good solution is to ask a groomer or vet to show you how during a routine visit – a few minutes of instruction can significantly boost your confidence for future attempts at home. In case of accidental cutting and bleeding, it's worth keeping a styptic product designed for this purpose on hand, and if the bleeding doesn't stop, contacting the clinic.
Bathing and Mats – Why the Order Matters
Brushing and bathing are two tasks worth planning together, not separately. The coat should be thoroughly brushed before a bath, not just afterwards – water and shampoo make hair swell and mat more easily, so even a small, unnoticed tangle can turn into a hard mat once it's been wet, one that will take much more time and patience to brush out. So if you're planning a bath, always start with a thorough brush-through, and only then move on to the water – it's one of those rules that seems obvious, yet still gets skipped in the rush of everyday life.
When It's Worth Using a Groomer
Even with regular brushing at home, a periodic visit to a professional groomer can be invaluable – particularly for sanitary trimming around the tail and inner thighs, trimming fur between the paw pads, or removing larger, neglected mats in a way that's safe for the dog's skin. A groomer can also advise on which tools work best for your particular dog's coat type, and flag early signs of skin problems that are easy to miss with home grooming alone. For many families, a regular groomer visit, combined with daily grooming at home, turns out to be the most practical solution.
When choosing a groomer, it's worth paying attention to whether they have experience working with breeds with a similar coat type, how they respond to questions about mat-removal technique, and whether they approach the dog calmly and patiently, without rushing. A good groomer will happily explain why they're suggesting a particular procedure, and for very large, neglected mats, will honestly tell you whether the safer option, in that particular case, is clipping them off rather than continuing with painful brushing.
Making Brushing Something Your Dog Enjoys
Brushing, like bathing, can – and should – be turned into a pleasant ritual rather than a daily battle.
- Start with short sessions, especially with puppies and dogs that haven't had good experiences with brushing before.
- Pair brushing with something pleasant: a treat, calm conversation, petting in their favourite spots.
- Don't force your dog to sit through a whole session if you see clear signs of discomfort – it's better to take a break and come back to it shortly after than to build a lasting negative association.
- Be consistent – regularity turns brushing into a predictable, familiar part of the day for the dog, rather than a surprising, stressful event.
- Choose a time of day when both you and the dog are calm and unhurried – for example after a walk, when the dog is already tired and more willing to lie still.
- Remember that a calm, patient owner passes that calm on to the dog – rushing and frustration do exactly the opposite.
Brushing as Time for the Two of You
It's worth coming back, at the end, to the thought we started this article with. It's easy to treat brushing as a tiresome chore that gets put off, but with the right approach, it can become one of the more enjoyable moments of the day – for both dog and owner. A few minutes of calm, focused attention, without a phone in your other hand and without rushing, is not just a chance to look after the coat, but also for simple, close contact that builds a bond over the years. Dogs that have positive experiences with brushing from puppyhood usually also accept other grooming and medical procedures more readily, such as being listened to with a stethoscope or examined by hand, which is why these everyday moments with a comb and brush are an investment that pays off during check-ups too.
The Most Common Mistakes in Caring for a Cavalier's Coat
- Brushing only the top layer of the coat, without the comb reaching the skin.
- Putting off brushing "until tomorrow," until a small tangle has time to grow into a large mat.
- Trying to yank mats out by force instead of patiently working them loose from the edges.
- Cutting mats with ordinary, sharp-tipped scissors close to the skin – risking injury.
- Skipping the harder spots – armpits, groin, the area behind the ears.
- Ignoring the ears and eyes during routine coat care.
- Bathing a dog before brushing it thoroughly, which sets existing tangles in place.
- Too-infrequent groomer visits despite a dense coat that mats quickly.
Frequently Asked Questions
How often should a Cavalier be brushed?
Ideally a few times a week, and in spots most prone to matting – behind the ears, under the arms, in the groin – ideally daily or every other day. Short, regular sessions give better results than infrequent, long sessions spent detangling neglected fur.
Can you bathe a dog that has mats?
It's better to brush the coat out first, and only then bathe – water and shampoo make existing mats pack together and harden even further, making them harder to remove afterwards. If the mats are large and hard, it's sometimes best to consult a groomer first, before deciding to bathe at all.
How do you remove a mat without hurting the dog?
It's best to start with detangling spray and patiently separate the hair with your fingers from the edges of the mat, always holding the skin at its base. Large, hard mats are safer left to a groomer or discussed with a vet, rather than risking injury to the skin with attempts at home.
What tools are absolutely essential?
The basic kit is a wide- and fine-toothed comb, a slicker brush, a dematting tool, and scissors with a rounded tip. A detangling spray makes the whole process noticeably easier, especially with dry fur. You don't need to buy the entire range available on the market straight away – it's better to start with this basic kit and add further accessories as needed, based on what you find is actually missing from your day-to-day grooming.
Can neglected mats harm a dog's health?
Yes – large mats can pull and press against the skin, encourage moisture build-up and irritation, and in extreme cases hide inflammation or wounds that aren't visible until the mat is removed. That's why it's worth treating regular brushing as part of preventive health care, not just cosmetic grooming.
How do you care for a Cavalier's ears and eyes day to day?
It's worth regularly checking the ears for smell, redness, or excess wax, gently brushing the fur around them, and turning to a groomer or vet if in doubt. The area around the eyes is worth cleaning of dried discharge on an ongoing basis, and trimming fur that grows too long near the eyelids, while watching for excessive tearing or redness.
From what age should you get a puppy used to brushing?
Ideally from the first weeks after bringing the puppy home – short, positive brushing sessions from a young age mean the dog treats the activity as a natural, enjoyable part of its daily routine, rather than something to fear. It's also worth using this time to get the puppy used to having its paws, ears, and muzzle touched, since that will make both grooming and routine vet examinations much easier later on.
Regular brushing and looking after a Cavalier's coat is one of those tasks that's easy to put off "until tomorrow," yet one that genuinely affects the dog's comfort and health over the long run. A little consistency – a few minutes of brushing several times a week, attention to the spots most prone to matting, and a quick response to the first signs of trouble with the skin, ears, or eyes – spares your dog discomfort, and spares you time and frustration when things have been left too long. You don't need to become an expert at once in untangling the toughest mats – it's enough to start with small, consistent steps, and work out the rest, if needed, together with a groomer or vet. If you have questions about your dog's coat care, have found a large mat that's hard to remove, or notice any concerning signs involving its ears or eyes, the team at the Hau-Miau clinic at ul. Siemieńskiego 23 in Warsaw's Ochota district would be glad to help. Book a visit — call +48 22 823 35 63.